Your own server is the most convenient way to play together with friends. In addition, having figured out all the features of its creation, you can even make money on it. There are several possibilities to create your own server and this guide will help you choose the most convenient one.
Each of these methods has certain advantages and disadvantages. Check them out to find the best option for yourself.
Ready Made Solution from Server Hostings
If you want to quickly create the top level server, then just use Minecraft server Hostings. Here, even novice users will be able to quickly launch their own servers with mods, plugins, and even a donation system.
For exemple, you can use Scalacube. The service is paid, but prices start at just $2.5. For such a cost, you will get a virtual server of 768 MB of RAM and 10 GB of disk space for a month. This will be enough for a comfortable game with at least 10 players and connecting even the most demanding mods.
If you want more, just use other tariff plans that allow you to get up to 32 GB of RAM and up to 3200 GB on an SSD-drive. Moreover, all tariff plans include hosting of your own website with a ready-made forum and a donations service. This will allow you not only to have fun in Minecraft with friends, but also to earn money on your own project. You will also receive a fully working launcher, so players could quickly enter the server with their username and password.
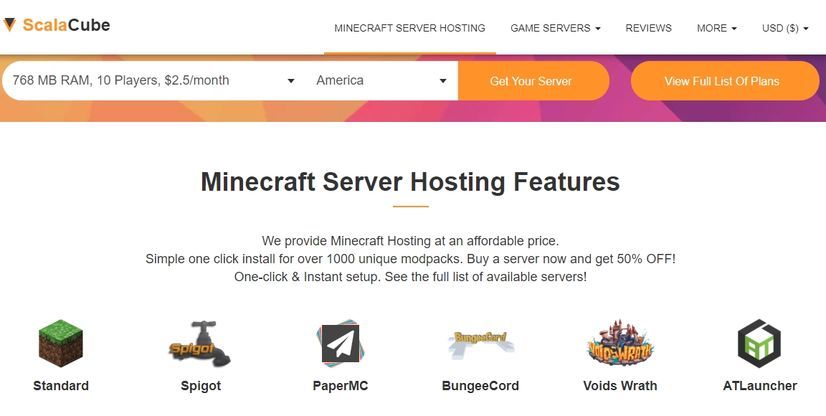
To use all the features of Scala Cube, you do not need programming or administration skills. After registering on the site, you can choose the appropriate server build and install it in one click. You can also add the necessary plugins or mods at any time by uploading them manualy.
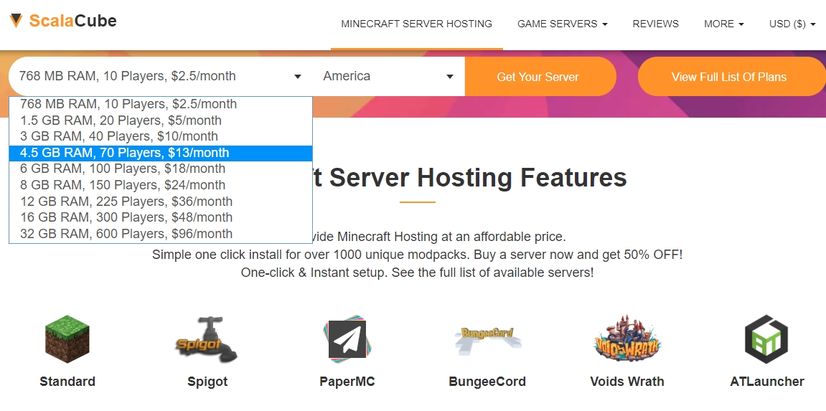
You can start creating a server by choosing the most suitable tariff plan. The minimum cost of hosting is $ 2.5. It will be quite enough for playing with friends on the tested versions of Minecraft (from 1.7.10 to 1.10.2). Newer versions require more RAM. When creating a server, you will see the requirements for the build and you can purchase the best option.
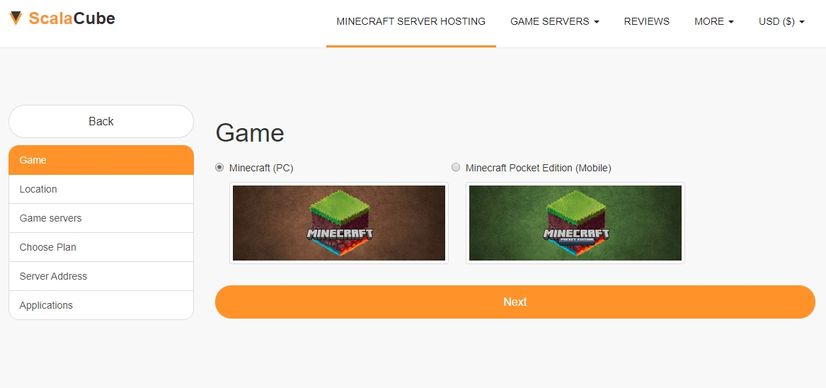
Having decided on the tariff and clicking “Get your server”, you will be taken to the assembly selection menu. Here you can choose a clean server, modifications like Bukkit or BungeeCord, and even ready-made assemblies with pre-installed mods, for example, Pixelmon. At this stage, you can see how much memory each assembly requires, which is very convenient. If necessary, you can immediately change the tariff plan to a more suitable one. On one hosting you can place as many servers as the total amount of RAM allows.
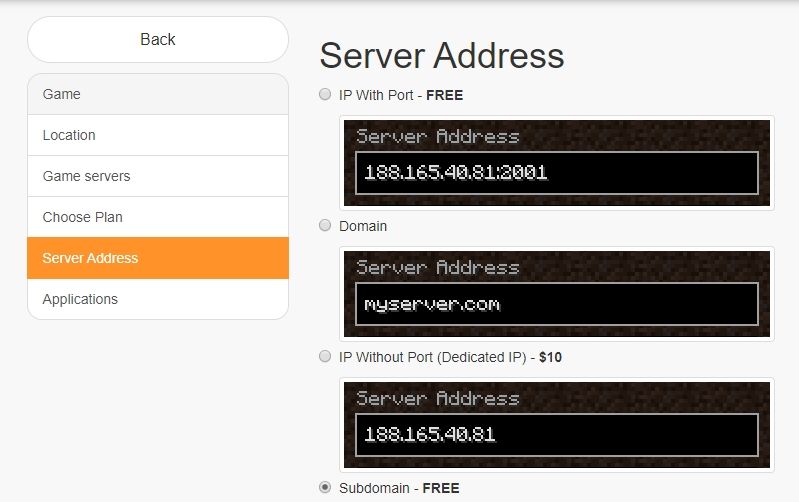
In the next step, you can select the server address. It can be an IP with a port (free) or a dedicated IP without a port (this option costs $10). In addition, you can set the server address as a subdomain. In this case, you can choose the name yourself, and it will be very easy to remember. This option is also free.
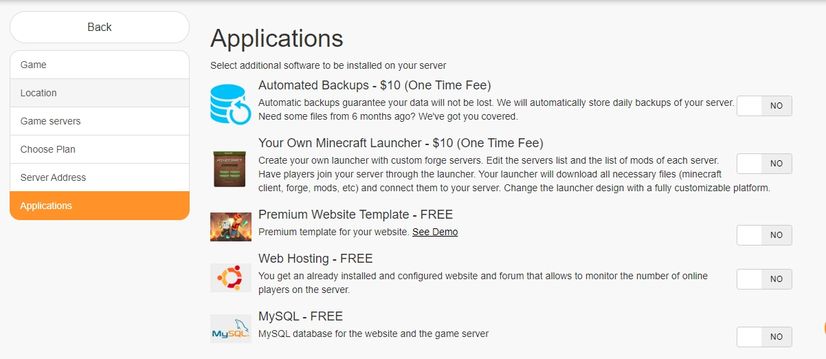
At the last stage, you can connect additional features. For example, you can get your own website with a beautiful design that you can use to publish server news or organize a store with a donate. All additional features are included in the cost of hosting, you can connect them at your discretion.
After completing the registration process, you will receive full access to all files, as well as to the admin panel of the site. All versions can install any mods and plugins.
Pros
- the fastest and easiest server creation;
- ready-made assemblies, including official, Bukkit, Cauldron, PixelMon and many others;
- the ability to modify the server by adding any plugins and mods;
- multiple servers on one account;
- the number of slots for players is not limited;
- ready site, donates store and launcher included;
- 24/7 online.
Cons
- monthly payment for hosting services.
Minecraft Realms Service
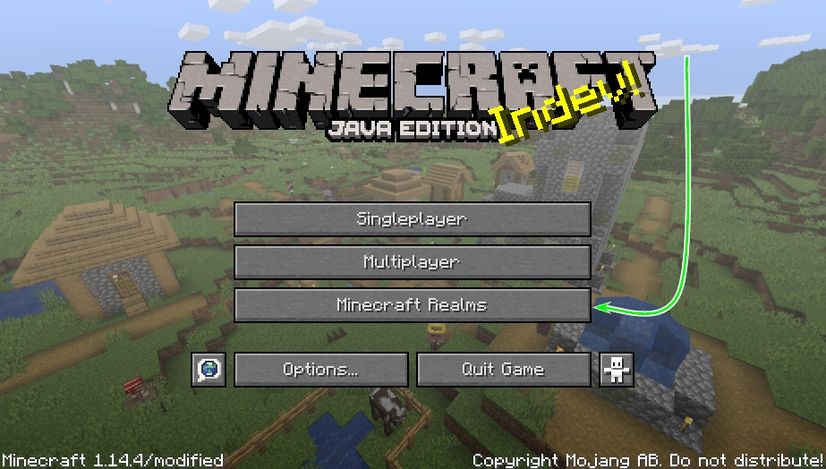
Minecraft Realms was introduced in 2017. This is a virtual server that can be launched directly from the game. It is not intended for commercial use, but is suitable for a small circle of friends. With it, you can create a world that will always be available to a selected group of people. The whole procedure takes place right in the main menu of the game, literally in a few clicks.
This service is paid, the minimum cost for Java Edition is about $ 3, while only three slots for players will be available. In addition, you will need a licensed version of Minecraft and a Mojang account. To create your world in Realms you need to do the following:
- Launch Minecraft from the official launcher;
- In the main menu, select Minecraft Realms;
- Follow simple step by step instructions;
- Create a new map or load a finished one;
- Invite friends from the list.
If you are not sure whether such a service is suitable for you, then you can use the free trial version for 30 days.
Pros
- ease of creation and use;
- 24/7 online;
- high-quality technical support from Mojang;
- no need to download and install any third-party software.
Cons
- pretty high subscription price;
- limit on the number of players (no more than 10);
- lack of ability to use mods or plugins;
- the need to use a official version only.
Manual server creation
You can create a Minecraft server on your PC or use hosting services. In the first case, you need to activate the static IP service with your provider. Depending on the chosen OS, you will need to perform a certain sequence of actions.
Ubuntu
Linux-baseds servers on are the most reliable and stable, so we recommend using this particular OS. The following is a guide to help you create a server on Ubuntu.
First you need to install Java. If you are sure that you already have the latest version, you can skip this item. First you need to check the lists of available updates by running the command:
After that, you can start downloading and installing the latest version of Java:
If you want the server to run in the background, you can also pre-download screen. Installation is performed using the following command:
You will also need the wget downloader, if it is not already installed then just run the command:
Next, create a folder in which the server files will be stored and go to it:
mkdir minecraft
cd minecraft
After that, you can download the server files. If you opted for the official server build, then you can get it with the command:
Instead of Xs, substitute the necessary version of Minecraft, at the time of writing the guide, the last available for download was 1.15.1.
After downloading, read the user agreement and accept it:
Now you are ready to start your server. If you want it to work in the background, then first run screen:
Instead of My Minecraft Server, you can use any name of your choice.
To start, you need to decide how much memory to allocate for Java. It is recommended to allocate at least 1 GB, but you can give a lot more, depending on the characteristics of the PC and the planned number of players. The following command is responsible for starting the server:
The selected number (2048) displays the amount of RAM in megabytes and corresponds to 2 GB. After the command is executed, the download will follow and if after its completion you see the inscription Done, then the server has been started successfully. You can connect to it using your static IP or virtual server address. To access the settings, use the command:
CentOS
For this Linux distribution, you will also need to install screen and Java. This can be done with one command:
After that, it is recommended to create a folder for the server and immediately go to it:
cd minecraft
From inside the folder, you can start downloading the server file. To do this, run the command:
Instead of Xs, substitute the necessary version of Minecraft, at the time of writing the guide, the last available for download was 1.15.1.
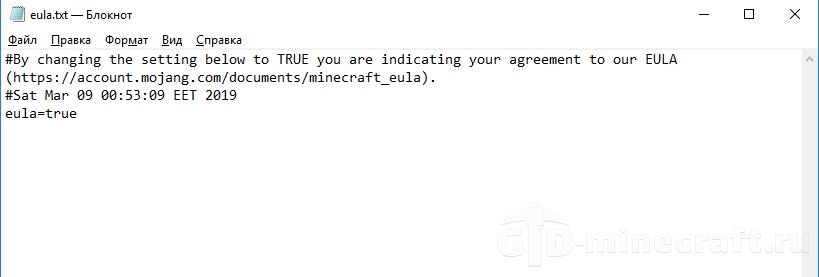
Here you will also need to accept the license agreement. To do this, open the eula.txt file using the command:
In the line eula=false, replace false with true and save the file.
Next, you need to start the screen session, giving it a recognizable name, for example:
Now everything is ready to start the server, you just need to run the downloaded file, allocating it the desired amount of RAM. To do this, enter the command:
The amount of memory is indicated in megabytes, 1024 MB correspond to 1 GB. You can allocate any number, depending on the power of the PC and the estimated number of players.
To access the file with server parameters, enter it on the command line:
Windows
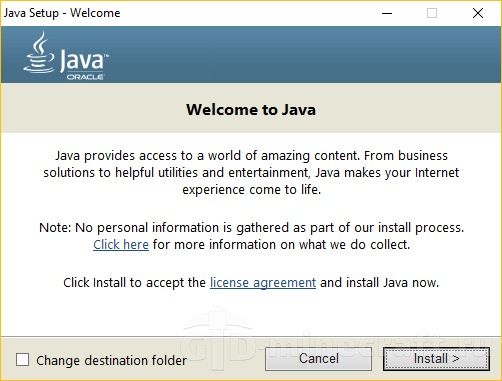
As with Linux, you first need to install or upgrade Java. To do this, download the file from the official site and follow simple instructions.
Here we look at installing an official server from Mojang. Today there are several alternative assemblies, however we will consider them in a separate guide. First of all, you should download the latest version of the server from the official site. The file will be called server.jar. You can also download earlier versions of servers in a special section. We recommend placing it in a special folder to avoid confusion. Start the file by double-clicking, after which several files and folders will appear next to it.
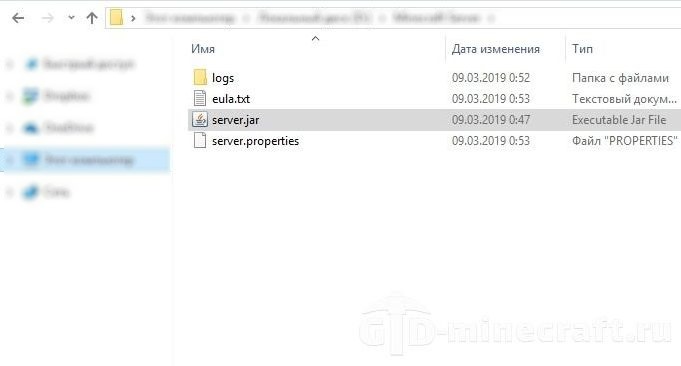
Open the eula.txt file and in the line eula=false replace false with true:
After that, run the server.jar file again and wait for it to start. As a result, the following window should be displayed:
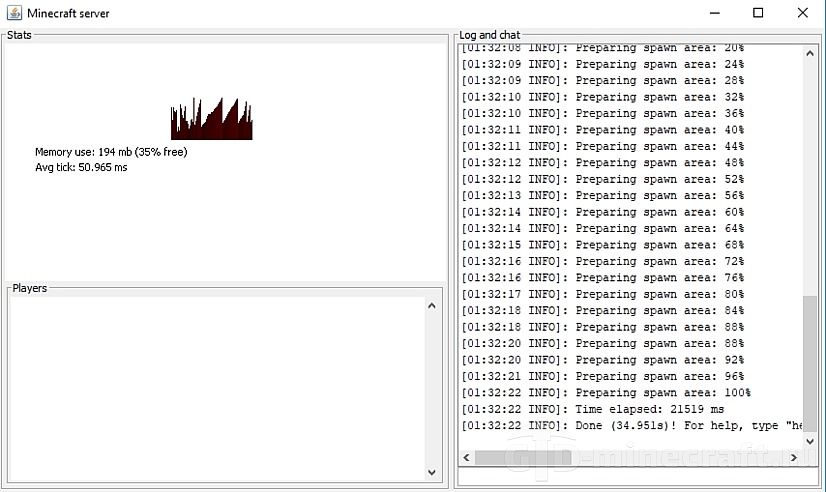
Now you can connect to your server, but if it was running on your PC, it will be unavailable after it is turned off.
Pros
- no need to pay for hosting;
- quick access to all files.
Cons
- it will be quite difficult for beginners to figure out;
- the need to purchase a static IP;
- server shutdown when turning off the computer;
- if you want to start the server and play from one computer, then it must be powerful enough.
Starting a server is just the beginning. We will tell you about its configuration and support in detail in the following guides.